The Best Ways To Use Tattoo Numbing Cream For Every Procedure
The Best Ways To Use Tattoo Numbing Cream For Every Procedure
Most procedures that enhance your appearance will hurt to some extent. Fortunately, topical anaesthetics (despite any myths you might’ve heard) numb some of the pain to make a treatment feel less intimidating. Whether you’re longing for a new tattoo, sleek semi-permanent brows or even a fresh bikini wax, we’re sharing everything you want to know about numbing creams, how they work and how to use Zensa Numbing Cream for every type of common procedure.
Read on for your full guide to tattoo numbing creams, how to use them for tattoos, microblading, lip blushing, microneedling, waxing and piercings and more.
What is Tattoo Numbing Cream?
Tattoo numbing cream is a topical anesthetic that blocks nerve signals in the body to reduce the skin’s sensitivity and pain receptors in a given area. These products contain the same ingredients as those used in injectable anaesthetics before minor surgeries. However, the numbing properties in topical anaesthetics take longer to activate and require adequate time to properly absorb into the skin. Lidocaine is the most common active ingredient found in OTC and prescription-strength numbing creams. Alongside its strong numbing properties, lidocaine absorbs the most quickly and is the least toxic among the topical active ingredients available. Some other popular active ingredients used in skin-numbing creams include benzocaine, prilocaine and tetracaine.
These ‘caines’ are all different variations of medically-regulated cocaine. Certain caine variations are more potent than others. Therefore, the percentage of a given caine used does not directly correlate with the strength of the numbing cream For example, you can find products with up to 5% lidocaine and 20% benzocaine available for purchase without a prescription.
While numbing creams make getting inked less painful and intimidating, these topical anaesthetics are not reserved for tattooing alone. Topical anaesthetics are widely used in permanent makeup studios and medical spas for a range of services, including: microblading, lip blushing, waxing, electrolysis, microneedling, lip fillers, botox and other temporary cosmetic procedures. Many permanent makeup artists, licensed estheticians, cosmetologists and plastic surgeons consider using a numbing cream, like Zensa Numbing Cream, to be an essential step in their treatment process.
Benefits of Tattoo Numbing Cream
- Less Pain During The Procedure
- Provides Mental Preparation For A Tattoo, PMU or Cosmetic Treatment
- Prevents or Reduces Pain Post-Tattoo Session
- Supports The Initial Tattoo Healing Process
The primary (and most obvious) benefit of using a numbing cream is a less painful tattooing (or filler, microneedling or waxing) experience. While you still should not expect a pain-free tattoo session, topical anaesthetics – when properly applied – can drastically reduce how much it will hurt to complete your tattoo. Numbing creams can be particularly helpful when getting inked in one of the most painful areas to get a tattoo or for longer sessions when getting a large or intricate piece. For less invasive procedures – like microblading, lip blushing, microneedling, botox or fillers – numbing cream can make an otherwise painful session into a treatment where one experiences mild pressure or a low-grade scratching sensation. Zensa Numbing Cream contains 5% lidocaine to ensure maximum-strength pain reduction during your tattoo session.
Many tattoo artists don’t like most numbing creams because they contain vasoconstrictors that can affect how the ink settles into the skin and, therefore, the final look of your piece. Importantly, Zensa Numbing Cream does not contain vasoconstrictors – providing a win-win solution (that’s tattoo artist-approved). Because Zensa Numbing Cream doesn’t include vasoconstrictors, getting inked can be a more pleasant process that doesn’t leave you worrying whether some temporary relief will ruin the final look of your tattoo. The ink will settle normally using Zensa Numbing Cream, so enjoy a less painful tattoo experience while still leaving the studio with a crisp and bright tattoo.
While the waiting periods differ for various procedures – whether you’re getting a permanent or semi-permanent tattoo, cosmetic treatment, wax or piercing done– there’s always some buffer time between applying the numbing cream and the needle first grazing your skin. During the time it takes for the lidocaine to activate, you have between 20-60 minutes to mentally prepare for your treatment. Use this better portion of the hour to collect yourself and relax. If you don’t let yourself unwind, your muscles become tense. Pain sensitivity almost always heightens when stressed.
Once Zensa Numbing Cream takes effect, the numbing sensation lasts for 2-3 hours. It is safe to reapply throughout the procedure as needed, to extend the numbing sensation. Zensa Numbing Cream contains vitamin E, which is packed with antioxidants to offer anti-inflammatory benefits, moisturize and aid the skin barrier to support the initial stage of the tattoo healing process. Our formula’s vitamin E concentration can help ward off dryness and irritation that results from cosmetic treatments, such as microneedling and waxing.
What To Look For In A Numbing Cream (Quality Over Quantity)
Finding a product with the ideal active ingredient potency is key. When a topical anaesthetic has a very high percentage of the active ingredient, it can wane in efficacy and even pose potential health risks for clients. Our in-house expert, Aly Lalani, explains: “Professionals often erroneously believe that if their topical anaesthetic uses varying different caines and higher percentages of the caines that this will be a better topical anaesthetic,“ he said. “What professionals may fail to understand is the science of absorption through the skin: if you have huge percentages of an active ingredient in your formulation, and it is formulated poorly, very little will be able to absorb through the skin, and causing the topical anaesthetic as ineffective.”
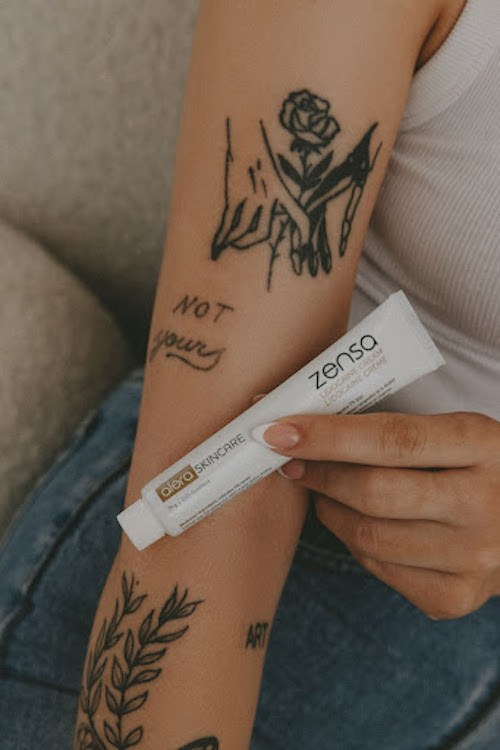
Determine whether the product you’re examining contains lidocaine or benzocaine as the main ingredient. Lidocaine – in nearly every case – is the best option. Aside from its superior numbing capabilities, lidocaine naturally contains an acidic pH (less than 7) – meaning it will not exfoliate or cause swelling to the top layers of the skin. It is incredibly important to select a tattoo numbing cream with a pH of less than 7 to ensure that the topical anaesthetic does not alter the design, shape or vibrancy of your tattoo and does not damage the skin barrier. Zensa Numbing Cream contains this natural pH formulation that supports the skin barrier, making it safe to use on sensitive areas like the lips and bikini area and protecting the integrity of a permanent or semi-permanent tattoo.
Over-the-counter numbing creams contain between 1-5% lidocaine. While you can use products with a low lidocaine concentration (1-3% lidocaine), you need to apply more product and leave it on for longer to feel the numbing sensation. The FDA and CFIA consider 5% lidocaine as the legal limit for over-the-counter topical anaesthetics (the same concentration in Zensa Numbing Cream). Using a topical anaesthetic with 5% lidocaine provides the best of both worlds – maximum numbing strength and safety.
Overview: How To Use Numbing Cream
Every topical anaesthetic formula requires a specific application method to absorb properly into the skin. Topical anaesthetics are available in different textures, including gels, ointments and creams. Some options need to be refrigerated, while others are shelf-stable. Certain topical anaesthetics have higher absorption rates when covered. There’s less advantage to covering an oil-based topical anaesthetic versus a water-based numbing cream. The absorption rate of an oil-based topical anaesthetic will not differ much whether it’s wrapped or not before the tattooing process begins. However, covering a water-based numbing cream – like Zensa Numbing Cream – results in a 300-500% increased absorption rate.
Always follow the instructions on the product’s packaging. Listen to your artist or licensed professional on which topical anaesthetic is best for the procedure and your skin type to ensure the product is applied correctly.
It is essential to exfoliate and clean the skin before applying a numbing cream. For tattoos, PMU procedures (microblading, lip blushing, etc.), microneedling and waxing treatments, it is generally recommended to exfoliate the area a day or two before your appointment. Shower the morning of your session. The expert performing your procedure will also wash the area immediately before applying the numbing cream and beginning the treatment.
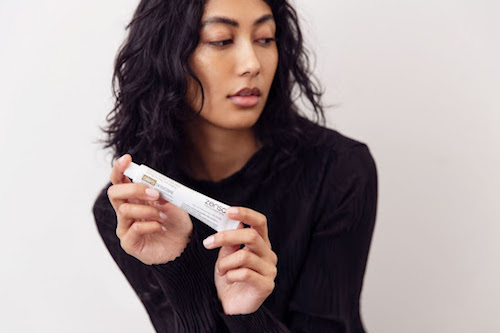
How To Use Numbing Cream For Tattoos
Prep your skin as best as you can before arriving at the studio. Having smooth, clean skin will increase the numbing cream absorption rate. Shave the area a few days before getting your tattoo. Always moisturize the skin with a hydrating, fragrance-free lotion after shaving. Exfoliate the area a day or two before the appointment. Diligently clean the skin with a fragrance-free soap in the days leading up to your tattoo session. Remember to cleanse the area the morning of your appointment. Speak with your artist if you’re hesitant to shave yourself and run the risk of razor bumps or skin irritation. Follow your artist’s recommendation on whether you should shave the area. When in doubt, your artist can probably shave the designated skin while you’re at the studio.
Apply the numbing cream, and leave it time to absorb into the skin. Zensa Numbing Cream should be applied 30-45 minutes before tattooing. Cover it immediately with saran wrap to increase its absorption rate. Take off the wrapping and wash off the numbing cream right before stenciling for your tattoo.
How To Use Numbing Cream For Permanent Makeup (PMU) Treatments
Whether you’re scheduling a microblading or lip blushing session, numbing creams can make the permanent makeup procedure hurt considerably less. For some clients, products like Zensa Numbing Cream make the microblading process virtually pain-free. The lips are a more sensitive area, so expect low to moderate pain – even with a numbing cream. When using a topical anaesthetic, many clients say that the lip blushing procedure feels like continuous small scratches on the skin.
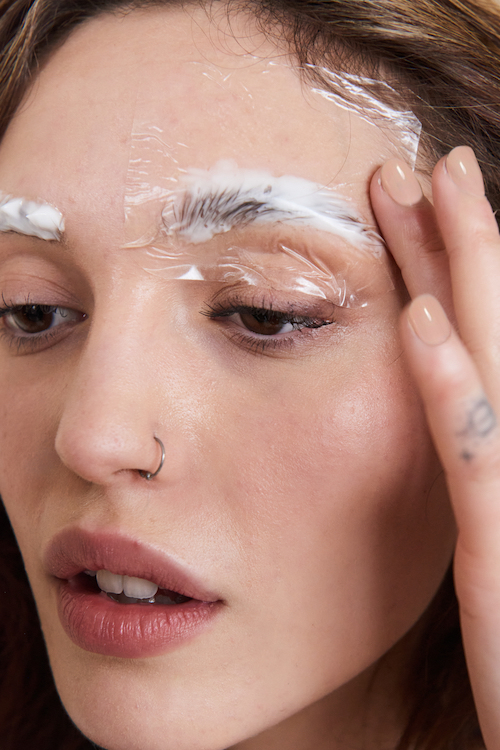
In the days leading up to your lip blushing appointment, exfoliate your lips with a sugar scrub. Always moisturize your lips after exfoliating. Keep your lip hydrated and use a lip balm throughout the day as needed. Arriving at your appointment with soft, smooth lips is essential for the numbing cream to best absorb into the skin (and evenly-pigmented lip blushing results).
After your initial consultation, your PMU artist will clean and dry the area before applying the numbing cream and beginning your microblading or lip blushing procedure. Zensa Numbing Cream should be applied 15-20 minutes before a permanent makeup treatment. The product will be washed off immediately before the treatment begins.
How To Use Numbing Cream For Microneedling
Stay mindful of your skincare routine during the week leading up to your microneedling session. To keep your skin clean and hydrated, wash the area with a gentle, fragrance-free cleanser in the morning and at night (face) or soap (body) daily. Follow up with a hydrating serum, like hyaluronic acid and a nourishing lotion. Do not use any occlusive moisturizers in the 7 days before your microneedling appointment. These products can lower the numbing cream’s ability to fully absorb into the skin. Do not moisturize your skin on the morning of your microneedling session. Wash your face (or body) with your gentle cleanser as normal.
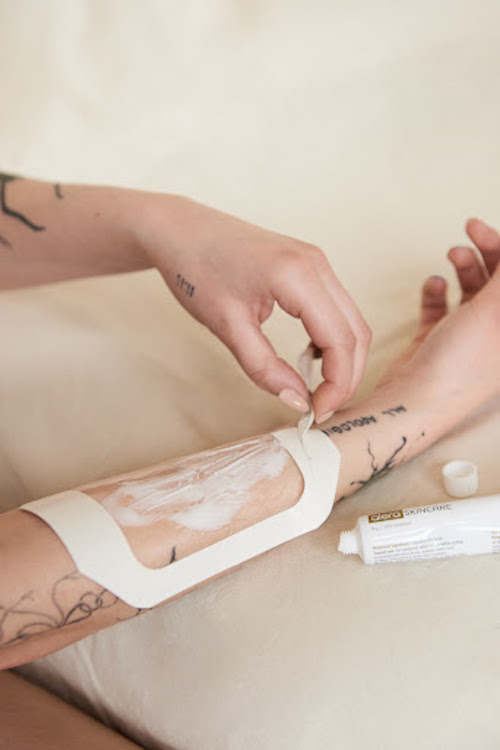
Before beginning the procedure, your expert should follow these 3 easy steps for proper Zensa Numbing Cream application, which we like to call our Clean + Apply, Wait and Remove method:
- Clean the skin thoroughly using an alcohol swab, and use a sterile applicator to apply a half-inch thick layer of the numbing cream. Reapply to cover the area if needed. Do not rub in the numbing cream.
- Leave the cream on for at least 30-45 minutes before the microneedling treatment. For better absorption into the skin and deeper numbing, occlude the area with an airtight dressing (such as Press’n Seal Saran Wrap).
- Gently dab away (don’t wipe) the excess cream with sterile gauze before beginning the procedure.

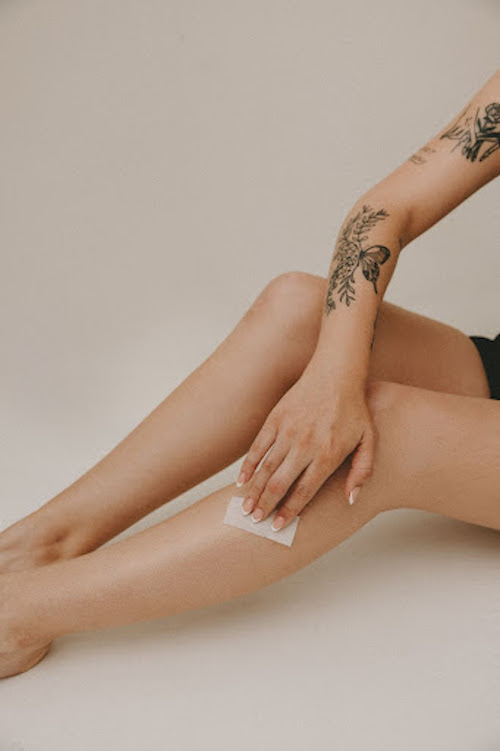
How To Use Numbing Cream For Waxing
Exfoliate your skin 1-2 days before your wax appointment. Keep the area clean and moisturize daily. Having soft, smooth skin allows the numbing cream to absorb properly into the area (and prevents ingrown hairs). Shower right before your wax, if possible. Otherwise, wash your skin in the morning on the day of your appointment or the night before. Either way, your waxing specialist will clean the area immediately before the hair removal process begins. Apply the numbing cream 20-30 minutes before waxing. Zensa Numbing Cream’s natural pH formula makes it safe to use on sensitive areas, like the bikini line.
While you want to leave enough time for the numbing sensation to take effect, make sure not to leave the numbing cream on for too long. Otherwise, you might not be able to sense that the wax is too hot, and it can burn your skin. The numbing cream will be wiped off right before waxing.
To reduce any potential pain, plan your wax schedule around your cycle. A bikini wax will hurt more during the 5 days leading up to your period when everything feels a bit more sensitive down there.

How To Use Numbing Cream For Botox & Fillers
While some fillers, like Juvederm and Restylane, contain small amounts of lidocaine, you can apply a numbing cream before getting any mainstream injectables to reduce the pain even more. For fillers, show up to your appointment 30 minutes early to give your doctor enough time to numb the area. Always show up to your session with a freshly-washed face (and lips). Apply the numbing cream around 10 minutes before injecting the skin. Products like Zensa Numbing Cream are suitable for sensitive areas like the lips to minimize the pain from lips fillers, face fillers and botox procedures.
Always speak with your provider before using topical anaesthetics for any cosmetic treatments.
How To Use Numbing Cream For Piercings
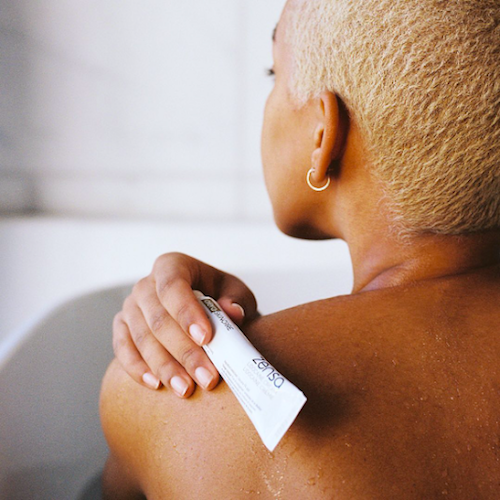
Piercings go through several layers of skin. Be patient with your numbing cream if you want to save yourself some pain. Always clean the skin before applying your numbing cream. Apply the numbing cream to the piercing site, and leave it on for around an hour. You should begin to feel the numbing sensation around 30 minutes after the product’s application. Zensa Numbing Cream is ideal for piercings because of its natural pH formula (designed for sensitive areas) and vitamin E concentration. Vitamin E offers anti-inflammatory benefits, which help aid the swelling that’s inevitable when getting an ear piercing or other placements on the face or body. Zensa Numbing Cream is unique because it can be applied to broken skin. So, you can reapply more of the product a few hours after getting your piercing if you’re still feeling some of the initial pain.
Potential Numbing Cream Side Effects
While lidocaine allergies are extremely rare, 93% of filler ingredients in topical anaesthetics are considered potentially allergenic. “There's always at least one filler ingredient in every topical anaesthetic that someone could be allergic to. The more ingredients in a product, the more likely someone will be allergic to it,” Aly Lalani, our in-house expert, explains. He recommends always doing a patch test before applying the numbing cream for a tattoo or cosmetic procedure. Some signs of an adverse reaction to lidocaine include:
- New or worsening swelling, rash or itching
- Cracked, dry or scaly skin
- Skin irritation
- Hives or welts
- Fever
- Dizziness
- Swelling of the eyes, lips, hands or feet
- Joint pain, stiffness or swelling
- Trouble breathing
As stated before, these symptoms are extremely rare. If you experience side effects from the filler ingredients, chances are you will only see increased redness, irritation, itchiness or a slight rash. Seek medical attention immediately if you believe you’re experiencing any side effects from a topical numbing cream.
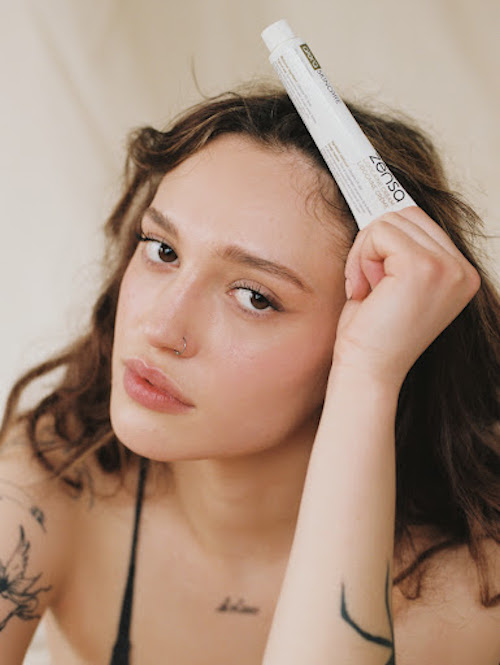
What To Know About Zensa Numbing Cream
Zensa Numbing Cream contains 5% lidocaine to offer a maximum-strength barrier for painful procedures like tattooing, permanent makeup treatments, microneedling, waxing, fillers and piercings. Our formula is vegan, steroid-free and has a natural pH formula that makes it suitable for sensitive areas like the lips and bikini area. Zensa Numbing Cream lasts for 2-3 hours on the skin and can be reapplied (even on broken skin) to extend the numbing sensation. It does not have any vasoconstrictors that impede ink setting and contains vitamin E to provide anti-inflammatory benefits to support the skin barrier and wound-healing process.
How To Apply Zensa Numbing Cream
- Exfoliate, and shower or clean the area with an alcohol swab
- Apply a half-inch thick layer of numbing cream (don’t rub it into the skin)
- Cover the area with Saran Wrap (such as Press’n Seal) to promote absorption into the skin
- Leave the numbing cream on for the allotted time needed (Tattoos & Hair Removal: 30-45 minutes, Permanent Makeup: 15-25 minutes, Injections: 10 minutes, Piercings: 10-15 minutes)
- Remove the wrap and gently dab away the excess numbing cream before beginning the procedure
Learn more about Zensa Numbing Cream and the world of topical anaesthetics; Here’s everything you should know about our unique formula.
