Essentials For Every Permanent Makeup Artist's Tool Kit: An Ultimate Guide
Essentials For Every Permanent Makeup Artist's Tool Kit: An Ultimate Guide
As a permanent makeup artist, you know every detail shapes the client’s experience. Refining your technique, stocking up on the proper supplies and building a comprehensive tool kit is essential for artists to ensure their client’s safety, comfort and lasting satisfaction with their permanent makeup session. Learn which basic products you must always have on hand - for hygiene, prep and after-care purposes – and specific items you’ll need to perform different types of permanent makeup procedures (microblading, lip blushing, permanent eyeliner and more). Some of these products you can easily find at a drugstore, while other specialty items require you to shop around.
Expert Tip: For permanent makeup prep and after-care, Zensa Numbing Cream and Zensa Healing Cream are the perfect additions to every artist’s tool kit. Zensa Numbing Cream contains 5% lidocaine for maximum-strength numbing effects and does not have vasoconstrictors that would affect ink settling or the final look of a cosmetic tattoo. Zensa Healing Cream includes medicinal-grade calendula oil and grapefruit essential oil to soothe inflamed, dry or cracked skin and promote wound healing. Our formulas are all vegan, steroid-free and offer anti-inflammatory benefits, thanks to the vitamin E and medicinal-grade essential oils in our numbing and healing creams respectively.
Here’s your ultimate guide to the essentials every certified permanent makeup artist (or an expert in training) must have in their tool kit for cleanliness, precision and customization during every cosmetic tattooing session.
What Is Permanent Makeup?
Permanent makeup (PMU) is a form of cosmetic tattooing that uses semi-permanent ink to provide a long-lasting alternative to your favourite traditional makeup products. Unlike an eyebrow pencil, lipstick or concealer, permanent makeup treatments typically last between 6 months and 5 years (often with touch ups)– depending on the procedure and individual factors like your skin type and lifestyle habits. Permanent makeup treatments work by injecting semi-permanent ink through to the bottom of the epidermis (top layer of skin) using handheld devices containing either a single or several small needles.
Types of Permanent Makeup:
- Microblading
- Lip Blushing
- Freckle Tattoos
- Hairline Microblading or Scalp Micropigmentation
Microblading is a form of cosmetic tattooing for the eyebrow that injects semi-permanent pigment into the top layer of the skin using a handheld device with a blade containing several tiny needles to create natural hair-like strokes. Expect your microblading results to last for between 18-30 months. Microblading is best for individuals with dry or normal skin types. Those with oily skin might see their brows fade too quickly. If you have oily or sensitive skin, consider nano brows over microblading. Nano brows are another form of eyebrow cosmetic tattooing that uses a single nanoneedle to create strokes that are nearly indistinguishable from your natural hairs. While the results look fairly similar, nano brows are often considered to be a more refined version of microblading. Nano brows inject the pigment more deeply into the skin, so the pigment will last longer (around 18 months) on oil-prone complexions.
Lip blushing (also called a lip blushing tattoo) is a permanent makeup treatment that uses a handheld device with a single needle to inject semi-permanent pigment into the top layer of skin on the lips. Unlike traditional lip tattooing, lip blushing offers both corrective (lip neutralization) and cosmetic benefits (a subtle wash of colour – think a ‘your lips but better’ shade or tinted like your favourite lipstick). These PMU treatments typically last between 2-3 years. Lip blushing sessions generally cost between $500-$1,500.
Freckle tattoos are a PMU treatment that uses semi-permanent ink to mimic the look of natural freckles – sans UV ray damage. The placement of your faux freckles will depend on any existing ones on your complexion or, if getting the procedure done in the winter, where they would appear naturally on your skin. Most freckle tattoos are placed on the nose and upper cheeks, the areas of the face where the sun often hits the most. Freckle tattoo treatments last for 1-3 years (annual touch-ups are recommended after the first and follow-up sessions). The cost of freckle tattoos can range from around $80-250 per session, depending on the desired number of freckles.
Hairline microblading or scalp micropigmentation is a cosmetic tattooing procedure that uses semi-permanent pigment to fill a receding or thinning hairline. Like eyebrow microblading, these hair-like strokes look very natural and are nearly indiscernible from real hair follicles to the untrained eye. Scalp micropigmentation (SMP) is like the nano brows of hairline microblading. However, scalp micropigmentation uses an electric PMU machine to inject small dots of pigment into the hairline to create the appearance of a fuller hairline. Hair microblading treatments last for between 12-18 months. The cost of a hair microblading session is around $550-$600, depending on the size of the scalp area treated. Scalp micropigmentation treatments typically last for around 4-6 years before a touch-up is needed. The cost of a scalp micropigmentation session ranges from approximately $500-$4,000, depending on the size of the area treated.
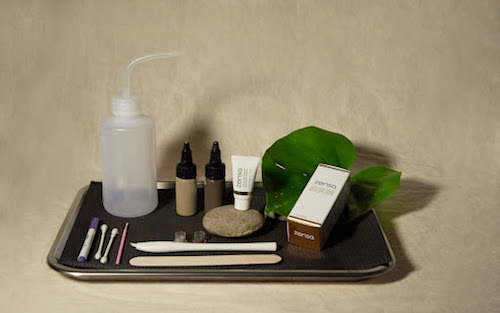
Permanent Makeup Artist Tool Kit Essentials:
- Rubber Gloves
- Face Mask
- Cling Wrap
- Barrier Film
- Alcohol Wipes
- Q-Tips
- Handheld Mirror
- Topical Anaesthetic (like Zensa Numbing Cream)
- PMU Blades (for microblading) or PMU Machine(for all other brow tattoos)
- Disposable Needle Cartridges
- Pigment Colour Assortment
- Pigment Cups
- Eyebrow & Lip Liner Pencils
- Pigment Fixing Agent
- White Eyeliner Pencil or Purple Pen
- After-Care Lotion or Ointment (like Zensa Healing Cream)
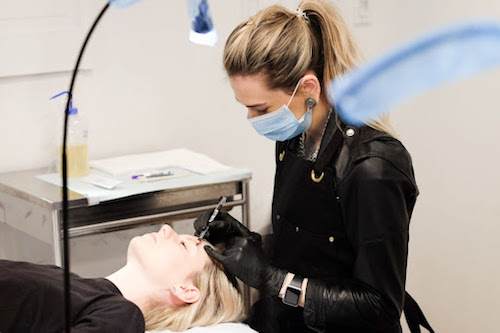
Hygiene should be your top priority. Without proper sanitation precautions, permanent makeup procedures leave the artist and clients susceptible to infections from bodily fluids, bacteria and other pathogens. Permanent makeup artists always need to wear gloves and a mask when performing a PMU treatment. Clients should never rest their heads on an uncovered surface or have their skin worked on without being cleaned immediately beforehand. Every instrument that touches their skin should be disposable or disinfected (or sterilized) before use.
Purchase disposable rubber gloves and surgical face masks for convenience, so you can use a new pair or mask with every client. Place a new layer of barrier film on the chair and trays for each session. To prep the skin for the PMU procedure, use alcohol wipes (or an anti-bacterial cleanser with a fresh paper towel) to wash the skin.
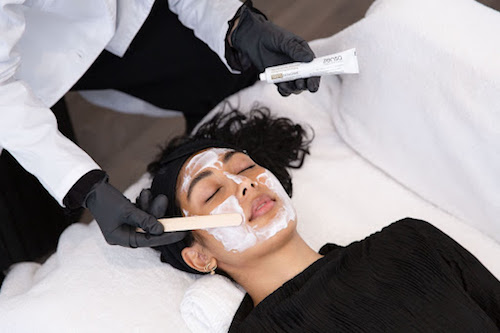
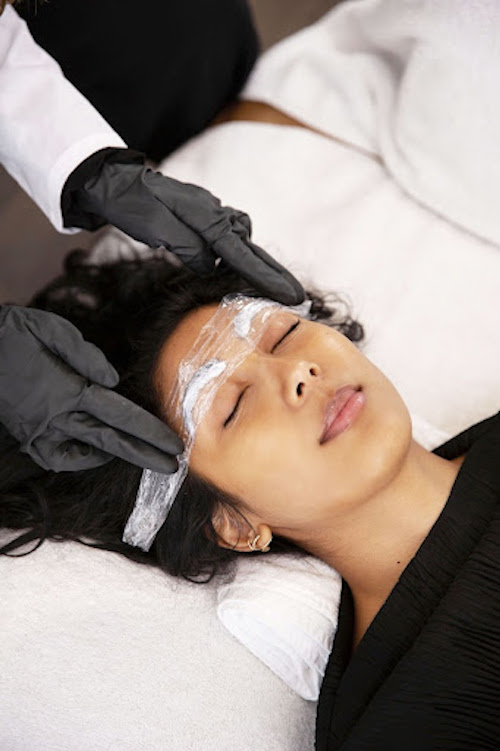
Keep a topical anaesthetic on hand (like Zensa Numbing Cream). Apply it with a sterile applicator. Use a fresh sheet of cling wrap (like Press’n Seal) to cover the numbing cream. When covered, topical anaesthetics with lidocaine as the active ingredient have a 300-500% increased absorption rate.
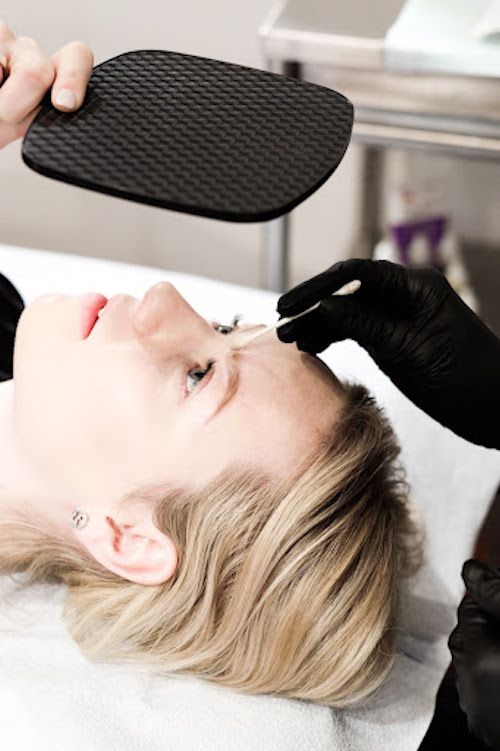
As a permanent makeup artist, it’s important to have a generous assortment of pigment shades available. The pigment colours you have on hand will depend on the types of permanent makeup services you’re offering. Whether you focus on microblading, lip blushing, permanent eyeliner or similar procedures, make sure to have several options available that flatter every skin tone (pale, Asian, olive, dark skin tones and selections for those with yellow, pink or neutral undertones). It is professional and courteous to make clients feel welcomed, understood and satisfied with their PMU results. Ensure that you have enough pigment cups available to use a fresh cup to mix a new custom shade for every client according to their needs discussed during your consultation at the beginning of your appointment. Have a handheld mirror available so your clients can see the pre-procedure outline and final PMU results (disinfect it before every session).
A PMU machine – of course – is essential for every artist’s tool kit. Look for wireless options, so you can use the device freely without worrying about cords restricting your passes. Always make sure the machine is fully-charged before beginning a session. While you can use the same PMU machine, every permanent makeup treatment requires a different disposable needle cartridge or microblade. Different shaped and sized needles (.25-.35 mm) are available to cater to different procedures and clients’ desired results.
Eyebrow and lip liner pencils allow you to outline the brow or lip shape, freckles or hair strokes for the client, so they can see the final results before you apply any semi-permanent pigment. Discuss and confirm this mock-up outline with the client to ensure they approve of your work before it’s too late. Have a dark brown eyeliner on hand for microblading, permanent eyeliner, freckle tattoo and hair microblading procedures. A red lip liner is ideal to outline the new lip shape for lip blushing treatments.

For exacting work, consider including items like a white eyeliner pencil, purple pen, tweezers and pigment fixing agent in your permanent makeup tool kit. Tweezers allow you to better shape the bows before beginning a microblading treatment or smoothen the corners of the lips before a lip blushing treatment. Use a white eyeliner pencil or purple pen to create a border around your outline for a microblading or lip blushing treatment. This expert-approved trick ensures the cosmetic tattoo is inked within the lines for a crisp brow or sharp pout. A pigment fixing agent is an after-care solution that helps lock in the pigment to avoid fading and improve colour penetration after a PMU procedure.
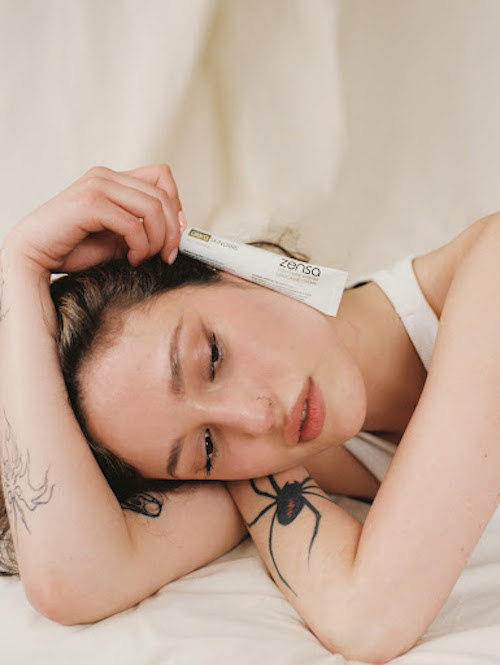
Set your client up for success. While you must provide them with detailed PMU after-care instructions, try to have some after-care products available in your kit (in smaller sizes) to either educate your clients on what products to use or even take home with them to ensure they’re taking good care of your finished work. Zensa Healing Cream will protect your skin by hydrating the area (to prevent cracking), encouraging cellular turnover (essential for wound healing), calming inflammation (to reduce redness or swelling) and preserving the pigment colour (for the perfect brow or pout, thanks to the sunflower seed oil in our all-natural formula) during the healing process.
Permanent Makeup Artist Tool Kit: Microblading Supplies
- Antibacterial Cleanser or Alcohol Swab Wipes
- Eyebrow Razor
- Eyebrow Mapping Tool (Brow Stencil)
- Brow Pencil
- Tweezers
- Cling Wrap
- Spoolies
- Micro blades/Microblading Pen (PMU Machine)
- Pigment & Pigment Cups
- Pigment Fixing Agent
- Numbing Cream
- After-Care Lotion or Ointment
Clean the skin and brows using the wipes right after your initial conversation on your client’s preferences and desired results. Using the eyebrow mapping method, shape the brows with your brow stencil and remove stray hairs with an eyebrow razor or tweezers. Outline the future shape of the eyebrows after microblading with your brown eyeliner pencil. Dot the border of this new brow shape with the purple pen to create a crisp, clean outline before beginning the procedure. Apply a topical anaesthetic like Zensa Numbing Cream using our expert-approved, three-step method:

Remove the numbing cream from one brow at a time as you perform the procedure to maximize its numbing effect. Use a pigment fixing agent, if needed, once the microblading session is completed.
Permanent Makeup Artist Tool Kit: Lip Blushing Supplies
- Antibacterial Cleanser or Alcohol Swab Wipes
- Lip Pencil (Lip Liner & White Eyeliner Pencil)
- Lip Blushing Pigment & Pigment Cups
- Lip Blushing Pen (PMU Machine)
- Needle Cartridges
- Pigment Fixing Agent
- Numbing Cream
- After-care Lotion or Ointment
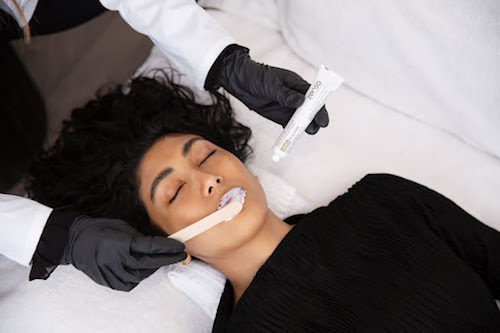
Once the client approves a colour choice and lip shape, the artist will mix a custom pigment for the lip blushing process using the necessary number of pigments in a pigment cup. The future lip shape should be drawn on with the vibrant lip liner and outlined using the white eyebrow pencil for clarity. After the lips are cleaned with an alcohol-based wipe, apply Zensa Numbing Cream to the lips. Leave it on the lips for 15 minutes to allow the numbing sensation to take effect. Wipe away the numbing cream from one lip at a time to maximize the numbing sensation. Apply the semi-permanent pigment using your PMU machine and a single needle cartridge (takes a few passes to complete each lip). Provide step-by-step lip blushing after-care instructions and product recommendations (like Zensa Healing Cream) if not already discussed.
Permanent Makeup Artist Tool Kit: Freckle Tattoos
- Antibacterial Cleanser or Alcohol Swab Wipes
- Brown Eyeliner Pencil
- Pigment & Pigment Cups
- PMU Machine
- Pigment Fixing Agent
- Numbing Cream
- After-care Lotion or Ointment
First, the artist will evaluate your skin type and examine for any present freckles. Then, your semi-permanent freckles will be mapped out across your face using a dark brown eyeliner pencil. Apply Zensa Numbing Cream and allow it to sit for 20 minutes. The artist should continuously remove the topical anaesthetic by section as the PMU procedure gets done to maximize its numbing effect.
Permanent Makeup Artist Tool Kit: Hairline Microblading or Scalp Micropigmentation
- Antibacterial Cleanser or Alcohol Swab Wipes
- Brown Eyeliner Pencil
- Pigment & Pigment Cups
- PMU Machine
- Numbing Cream
- After-care Lotion or Ointment
For a hair microblading treatment, the artist will mock up the final results by drawing on faux hair-like strokes with a brown eyebrow pencil. Once the outline is approved, the skin near the hairline will be washed and prepped with a topical anaesthetic. Leave on a product like Zensa Numbing Cream for 20 minutes. Wipe off the product once the client feels the numbing sensation and perform the hair microblading treatment with a PMU blade.
During a scalp micropigmentation (SMP) session, the artist will also mock up an outline for your future, fuller hairline with a brown eyeliner pencil. Next, after the outline is approved by the client, the skin near the hairline will be washed and prepped with a topical anaesthetic. Leave on a product like Zensa Numbing Cream for 20 minutes. Wipe off the product once the client feels the numbing sensation and perform the SMP treatment with your PMU machine.
How To Apply Zensa Numbing Cream
- Exfoliate, and shower or clean the area with an alcohol swab
- Apply a half-inch thick layer of numbing cream (don’t rub it into the skin). The cream should be thick enough that you cannot see the skin or hairs through it.
- Seal the area with Saran Wrap (such as Press’n Seal) to promote absorption into the skin.
- Leave the numbing cream on for the allotted time needed (Tattoos & Hair Removal: 30-45 minutes, Permanent Makeup: 15-25 minutes, Injections: 10 minutes, Piercings: 10-15 minutes)
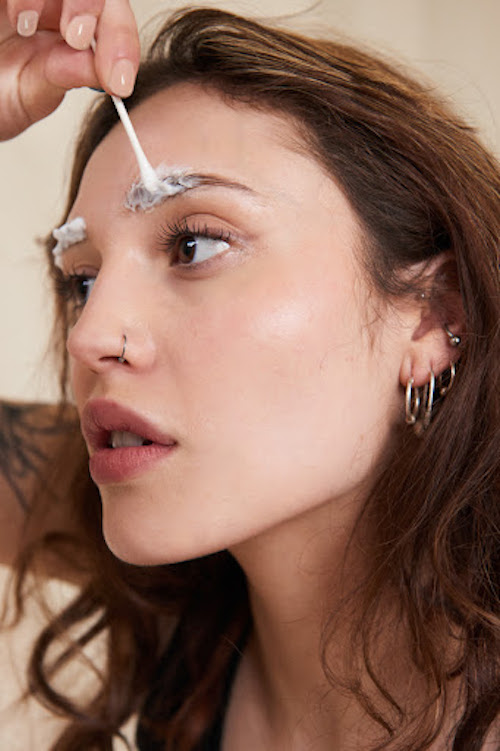
- Remove the wrap and gently dab away the excess numbing cream (don’t wipe it) before beginning the procedure.
Zensa Numbing Cream Product Details, Uses & Benefits
Zensa Numbing Cream contains 5% lidocaine to offer a maximum-strength barrier for painful procedures like tattooing, permanent makeup treatments, microneedling, waxing, fillers and piercings. Our formula is vegan, steroid-free and has a natural pH formula that makes it suitable for sensitive areas like the lips and bikini area. Zensa Numbing Cream lasts for 2-3 hours on the skin and can be reapplied (even on broken skin) to extend the numbing sensation. It does not have any vasoconstrictors that impede ink setting and contains vitamin E to provide anti-inflammatory benefits to support the skin barrier and wound-healing process.
