12 Steps To A Pain-Free Microneedling Experience
12 Steps To A Pain-Free Microneedling Experience
Microneedling is a minimally-invasive cosmetic treatment that involves using tiny needles to prick the skin, creating micro-tears. These surface-level injuries trigger the skin to accelerate its self-healing response. This cellular repair process stimulates collagen and elastin production to leave with a more even-toned and radiant complexion. Achieving smooth, youthful and glowing skin requires a similar effort to toning a specific muscle group at the gym. Similarly, the sentiment “no pain, no gain” probably resonates with many individuals who have undergone a microneedling treatment (or several of them). Microneedling can be fairly painful for clients if they have not thoroughly prepared, decide to forgo using a topical anaesthetic or choose not to follow proper after-care instructions.
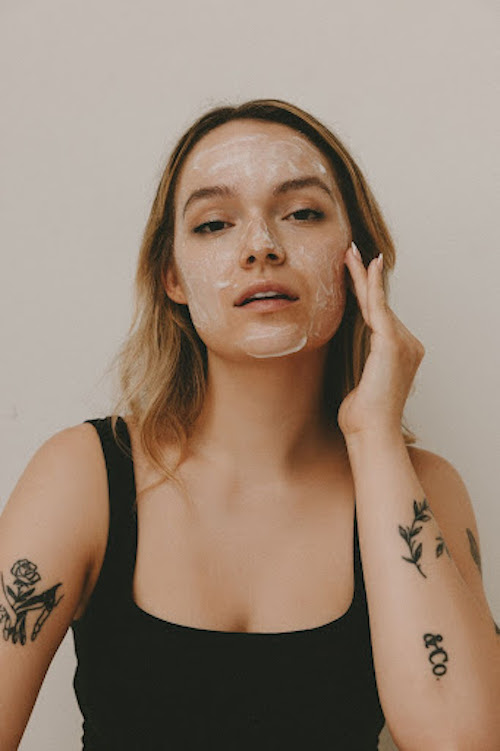
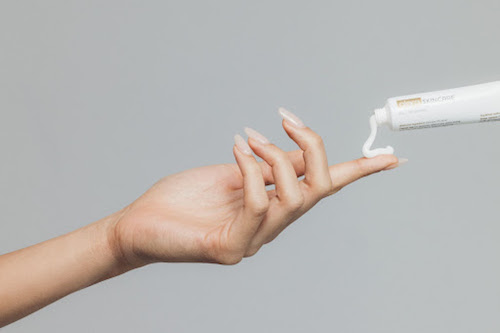
Expert Tip: Zensa Numbing Cream contains 5% lidocaine for maximum-strength pain prevention during microneedling treatments. Our vegan, cruelty-free formula has a natural pH, making it safe to use on sensitive areas like the face or lips. Zensa Numbing Cream contains vitamin E, which has anti-inflammatory benefits to support the healing process before the treatment even begins. While the numbing effects should last for 2-3 hours, our product can be safely reapplied to broken skin throughout the treatment to extend the numbing sensation for up to 6-8 hours.
Read on to learn about what exactly is and the benefits of microneedling, how much pain to expect and 12 steps to follow for a nearly pain-free microneedling experience.
What Is Microneedling?
Think of microneedling as a strength-training exercise for your collagen reserves. The small wounds resulting from microneedling offer both near-immediate and long-term benefits for your skin. Immediately after your “workout” (the microneedling treatment), your skin is sore and inflamed. You will see some initial results from microneedling like slight improvement in hyperpigmentation (sun spots or acne scarring), reduced pore size or fine lines and wrinkles and a generally smoother, more even skin tone. These results, though, will be short-lived without continuous treatments (usually every 4-6 weeks) – at least when you first begin microneedling. However, after regular treatments for a specific skin concern, your complexion maintains improved skin elasticity for longer after several microneedling sessions (usually 3-6 initial treatments). This process is akin to the long-term muscle memory that develops after months or years of consistent workouts or playing a sport. Similarly, most individuals can start going for more infrequent microneedling treatments (often 1-2 sessions per year) to maintain their results.
Is Microneedling Painful?
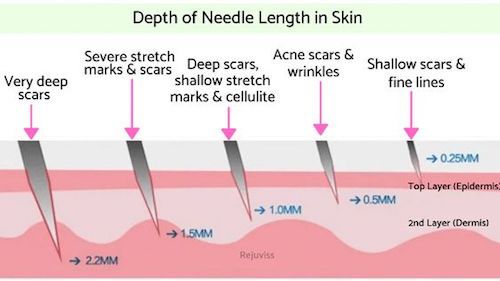
Microneedling is known to cause more discomfort than pain, especially if you use a topical anaesthetic like Zensa Numbing Cream. Certain factors like your skin type, personal pain tolerance, microneedling preparation, the needle depth used and stress level during the procedure all determine how much or little pain someone might feel during a microneedling treatment. Generally, microneedling rates at a 4/10 on the pain scale. If you’re concerned about how much your microneedling treatment may hurt, check out our guide on how to minimize pain during microneedling.
Credit: Unnie/Pinterest
What To Do Before Microneedling:
Step 1: Find The Right Expert (Dermatologist or Professional Medical Aesthetician)
Selecting a highly-skilled specialist is essential to a successful microneedling experience. Choosing the wrong person to perform your procedure can lead to adverse side effects from microneedling, including worsening scars, prolonged redness or bruising, bumps or holes in your skin and increased acne or signs of inflammation.
Do your research around your local area to see which dermatologists and medical aestheticians you should place on your consideration list. Another option is to seek a referral from a trusted family member, friend or coworker if possible. Consider the expert’s past results and skin concerns they most frequently treat with microneedling (e.g. selecting a specialist who regularly and successfully treats clients with acne scars or sunspots is best to see if you’re looking to reduce hyperpigmentation with microneedling).
Look for dermatologists and medical aestheticians who are informative (guide you through the consultation and process, while providing proper microneedling preparation tips and after-care instructions) and have comprehensive health and safety practices in place. The expert you choose should make you feel comfortable enough to ask questions or speak up about any concerns you have regarding any aspect of your microneedling treatment. Read reviews, call the office, inquire about their certifications and ask out their regular clientele or areas of expertise.

Step 2: Consider Your Cycle
If you’re biologically female, plan around your menstrual cycle when booking a microneedling appointment. Getting your treatment done right before or during menstruation can lead to a more painful microneedling experience and a prolonged healing process. Your skin is more sensitive and naturally less hydrated during that time of the month. So, it is recommended not to schedule your microneedling session 1-2 days before or at any time during your period.
Also, consider any normal PMS symptoms you typically get and at what point in your cycle these symptoms arise. If you’re prone to breakouts within the week before your period, you might want to schedule your microneedling appointment for the week after your period is over. Microneedling cannot be performed on any clients with active acne.
Step 3: Plan Your Cosmetic Treatments & Hair Removal Sessions Wisely
Cosmetic treatments and certain hair removal methods need to be avoided for up to 14 days before microneedling. Avoid heat-based cosmetic treatments, such as intense pulse light (IPL) therapy, laser treatments or Thermage for at least 2 weeks before your microneedling appointment. Stay clear of chemical peels and Botox within 2 weeks before microneedling session. Hair removal methods, including electrolysis, waxing or laser hair removal should all be avoided for 1-2 weeks before microneedling. All of these treatments heighten skin sensitivity and increase the risk of skin irritation.
Shaving is always an option if you need a safe hair removal method within the week of microneedling. Stop shaving the area where you will be receiving your microneedling treatment within 24-48 before your scheduled appointment. Shaving right before microneedling leaves you more prone to skin irritation after microneedling.
Step 4: Stay Out of The Sun
Wearing sunscreen daily is essential to good skin health at all times. However, protecting your skin from direct sun exposure is particularly important in the 1-2 weeks before your microneedling session. Sunburns aggravate the skin, leaving it red, itchy or inflamed. A complexion in this state could only compound any expected post-microneedling inflammation (a common side effect). Make sure not to get a sunburn within 7 days of microneedling. Use sunscreen, a hat, sunglasses and clothing to protect the area (face or body) before microneedling. Avoid any direct sun exposure for 24 hours before your microneedling appointment. You also will want to stay out of the sun for at least 48 hours after microneedling. Prioritize protecting your skin (using sunscreen, sunglasses, a hat or clothing) during this initial after-care period, including while walking home or to your car after the procedure.
Step 5: Assess Your Medication Intake
Avoid any anti-inflammatory pills (NSAIDs) or supplements, such as Aspirin, Ibuprofen, vitamin E, ginger and fish oil capsules, within 7 days of your microneedling appointment. These medications and supplements are known blood thinners. They can inhibit the body’s natural inflammatory response which is essential for proper recovery during the microneedlng healing process. Refrain from using these medicines too close to your microneedling session to avoid any bruising after microneedling.
Reminder: You need to be off of Accutane for at least 6 months to be eligible for microneedling.
Step 6: Evaluate Your Skincare Routine
Your skin is more sensitive after microneedling. So, establishing a microneedling-friendly skincare routine prevents uncomfortable side effects, like skin dryness and irritation, following the procedure. Start prepping your skin 4 weeks ahead of your microneedling appointment by incorporating Vitamin C, retinol and sunscreen into your daily skincare routine. Vitamin C and sunscreen protect your skin against UV ray damage, while retinol encourages collagen production, skin elasticity and reduces the appearance of fine lines and wrinkles. However, it is advised to stop using retinol the week before your microneedling treatment (and for 48 hours after the session).
Avoid the following skincare products and ingredients for 5-7 days before microneedling:
-
Alpha hydroxyl acids (AHAs)
-
Beta hydroxyl acids (BHAs)
-
Exfoliating products
-
Retinoids (vitamin A derivatives)
-
Benzoyl peroxide
-
Salicylic acids
-
Hydroquinone
-
Exfoliant masks
-
Topical antibiotics
Step 7: Maintain A Healthy Diet
Healthy skin comes from within. Having a nutrient-rich diet is essential for a clear, glowing and youthful complexion. Diets rich in vitamins A, C, E, K, B vitamins (especially vitamin B7 biotin and B3 niacin) and essential fatty acids (omega 3 and 6) are positively correlated with better skin health. These nutrients support the microneedling healing process to support your complexion through common side effects, such as dry skin, inflammation, mild bruising, redness, itching and sensitivity to the sun.
Vitamin C and E are an antioxidant-packed combination that helps increase collagen and elastin production, reduces inflammation, prevents wrinkles and fine lines and protects against sun damage. Also known for its anti-aging benefits, Vitamin A aids in skin tissue regeneration to prevent fine lines, wrinkles and dry, flaky skin. Vitamin K is known to reduce skin bruising, biotin produces fatty acids to prevent dry, itchy skin and niacin moisturizes your complexion while offering anti-inflammatory benefits.
Foods Rich in Vitamin C:
-
Citrus Fruits (Oranges, Lemons, Grapefruit)
-
Strawberries
-
Bell Peppers
-
Tomatoes
-
White Potatoes
-
Cruciferous Vegetables (Broccoli, Brussel Sprouts, Cabbage, Cauliflower)
Foods Rich in Vitamin E:
-
Almonds
-
Sunflower Seeds
-
Spinach
-
Collard Greens
-
Beet Greens
-
Avocado
-
Peanuts
Foods Rich in Vitamin A:
-
Carrots
-
Sweet Potatoes
-
Pumpkin
-
Squash (Butternut, Summer, Winter)
-
Leafy Green Vegetables (Kale, Broccoli, Spinach)
-
Tomatoes
-
Cantaloupe
-
Mango
Foods Rich in Vitamin K:
-
Leafy Green Vegetables (Kale, Spinach, Broccoli, Brussel Sprouts, Cabbage, Lettuces)
-
Soybean and Canola Oil
-
Fermented Soybeans (Natto)
Foods Rich in Vitamin B7 (Biotin):
-
Legumes (Peas, Beans, Lentils)
-
Sunflower Seeds
-
Almonds
-
Avocado
-
Sweet Potatoes
-
Mushrooms
-
Banana
-
Broccoli
Foods Rich in Vitamin B3 (Niacin):
-
Liver
-
Chicken Breast
-
Tuna
-
Peanuts
-
Avocado
-
Mushrooms
-
Green Peas
-
White and Sweet Potatoes
-
Brown Rice
Step 8: Stay Hydrated
It is common to experience tight, dry skin right after microneedling. Having dehydrated skin will only exacerbate these symptoms and make your skin texture thinner, making your complexion more prone to bleeding during your microneedling session and itchiness within the early after-care stages.
Drink at least 4-8 glasses of water daily in the days leading up to and on the day of your microneedling treatment. Pack your meals with water-rich fruits and vegetables. Avoid any tobacco or caffeine for at least 24-48 hours before microneedling (and for at least 7 days after your treatment). Try not to consume caffeine for 24 hours or at least on the day of your microneedling appointment. Moisturize your skin twice daily to provide a boost of topical hydration for a more even-textured complexion and a strong skin barrier.
Step 9: Practice Mindfulness & Reduce Stress
Stress lowers your pain perception and tolerance. While it is understandable that having needles poked into your face can induce some anxiety, mindfulness and relaxation are essential to minimizing pain during microneedling. Carve out some self-care time during the 48 hours before and on the day of your microneedling treatment. Go for long walks while listening to an upbeat playlist. Meditate or journal. Read a book, watch your favorite TV show or drink a cup of calming tea. Prioritize an activity (or two) that puts your mind and body at ease in your daily routine.
Step 10: Use A Topical Anaesthetic
One, if not the most, effective way to reduce pain during microneedling is to use a topical anaesthetic, like Zensa Numbing Cream, right before the procedure. Zensa Numbing Cream contains 5% lidocaine for maximum strength pain prevention to dull the pain caused by the needles pricking your skin. Exfoliate and wash the area before using the numbing cream to maximize its absorption rate. Use our 3-step application method to effectively apply Zensa Numbing Cream for microneedling:
1) Clean & Apply: Clean the skin thoroughly with an alcohol swab. Using a stencil applicator, apply a ½-inch thick layer of product to the area. Do not rub it into the skin.
2) Seal: Cover the area with cling wrap (such as Press n’ Seal) for maximum absorption. Leave Zensa Numbing Cream in place for 20-25 minutes before beginning the microneedling treatment.
3) Remove: Take off the cling wrap. Gently dab away (do not wipe) excess numbing cream using sterile gauze. Dab the excess product in sections throughout the microneedling treatment to maximize the cream’s numbing effects. Begin the treatment. Reapply Zensa Numbing Cream as needed. Safe to (re)apply on broken skin.
What To Do After Microneedling:
Step 11: Keep Your Skin Clean & Well-Moisturized
Microneedling temporarily compromises your skin barrier and leaves your skin in need of some extra TLC. A well-planned skincare routine is essential to support the microneedling healing process. The products you use during the microneedling after-care stages will greatly affect how quickly your skin recovers from the tight, dry feeling and inflammation you experience right after microneedling. Wait 6-8 hours after microneedling to first wash your face or designated flesh. Before the 6-hour mark, only lukewarm water and hyaluronic acid should touch this recently-treated skin.
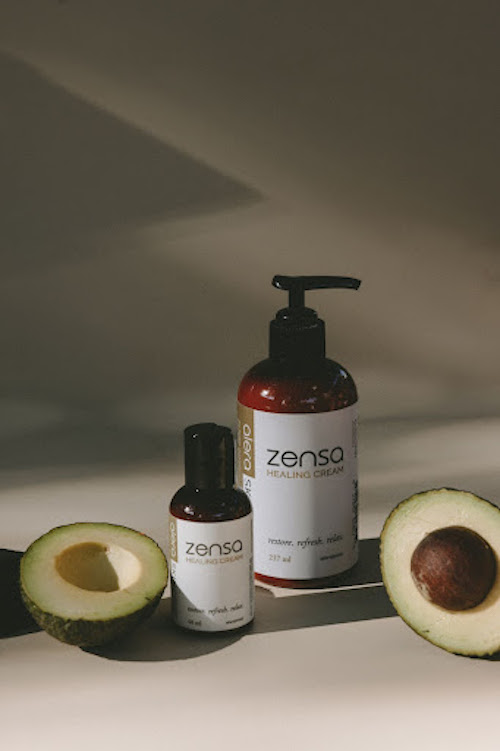
For the first 5-7 days after microneedling: Wash your face with a gentle, non-exfoliating cleanser and lukewarm water. Carefully pat your face dry with a fresh paper towel. Follow up with a hyaluronic acid serum and a nourishing moisturizer like Zensa Healing Cream. Peptides, ceramides, and vitamin E serums can be used alongside or instead of hyaluronic acid. Apply sunscreen with at least SPF 30 every morning, especially for the first 2 weeks. Wash and hydrate your skin twice daily using this simple routine.
All products on your skin after microneedling should be chemical and fragrance-free. Avoid ingredients like vitamin C, glycolic acid, alpha-hydroxy acids, retinol A, or at least 48 hours after microneedling. Be cautious when gradually adding these products back into your skincare routine, especially those used for powerful anti-aging benefits. It is best to wait at least 5 days before reintroducing products – especially if you have sensitive skin. Ask your expert for a personalized recommendation on when to add these ingredients back into your routine.

Step 12: Follow After-care Instructions & Protocols
The microneedling healing process takes around a week. The routine you implement for the first 1-3 days is the most important. However, there are certain after-care instructions you should follow for up to 2 weeks after microneedling. Sticking to these best after-care practices will help soothe the mild pain or soreness, skin dryness and inflammation and protect against infection while your skin recovers from the microneedling session.
Sleep with an elevated pillow for the first 1-3 days to reduce inflammation and swelling. Avoid wearing makeup for at least 24 hours after microneedling – it is optimal to wait at least 72 hours. Some other important after-care instructions for the first 72 hours include: Avoiding touching your face or fresh wound on the body (skin after microneedling) along with intense exercise, saunas, hot showers, and baths to prevent skin irritation or infection.
Do not consume caffeine, alcohol, or tobacco products for one week after microneedling. These products will dehydrate and increase skin tightness, which only adds to the discomfort of healing your freshly-treated skin. Also, wait a week to exfoliate the skin after microneedling.
Stay out of the sun for at least 2 weeks after microneedling. Wait at least 4-6 weeks to resume laser treatments or get a chemical peel.
Before heading to your treatment, check out our full guide on microneedling after-care instructions you must know.
